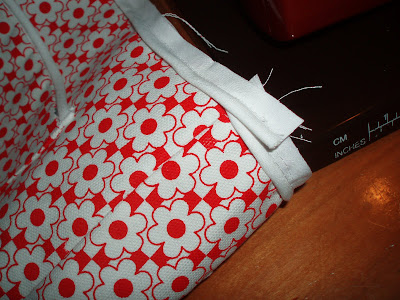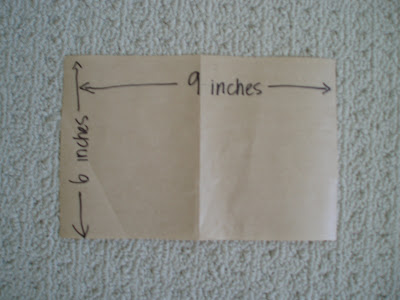
This handbag pattern is one I've had in mind for awhile. I spent a pleasant afternoon stitching and ended up with something fresh and cheerful for summer. The bag is 12 inches wide and 9 inches tall, plus the handles. It's large enough to hold a paperback book, a water bottle and the essentials of wallet, comb and lipstick. There are two pockets on the outsides - I love having easily accessible pockets for my keys and sunglasses.
Piping along the tops of the pockets and the bag adds a crisp finishing touch.
I took pictures as I went along, and wrote down the steps so that someday I can make this purse again, and I decided to share them.
Summer Handbag Tutorial
1. Gather your supplies.
1/2 yard (or so) of fabric (I used a decorator cotton print)
1/2 yard of heavy interfacing (fusible or sew-in)
1/2 yard of lining (I used a cotton broadcloth because that's what I had on hand)
matching thread
paper to make pattern (or mark directly on the fabric)
handles
hardware to attach handles to purse
1 package of cotton piping
2. Cut patterns as indicated. Place the bottom of the bag on a fold on the fabric, the lining and the interfacing. Cut 2 pockets. Cut one strip for handle loops.
 3. Apply piping to the top of the right sides of the pockets. Use a zipper foot and stitch close to the piping. Press piping up.
4. Press 1/4 inch to the wrong side of the 3 remaining unpiped edges of the pockets. Fold pockets in half and mark the center top and bottom with pins.

5. Unfold fabric bag. Mark centers with pins. Pin pockets 2 1/2 inches from the top edge of the bag, with the wrong side of the pocket against the right side of the bag. Match the pinned centers. Edgestitch pocket to bag (stitch close to folded edge.) Backstitch at beginning and end.

6. Pin and baste sew-in interfacing to wrong side of bag body. Or, fuse, if using fusible interfacing.

7. Fold bag right sides together, matching edges. Stitch a 3/8 inch seam from top to bottom on each side seam.
8. Box the bottom of the bag. Match the side seam you just stitched to the center fold of the bag bottom. You will end up with a triangular point. Measure down 1 1/2 inches from the point, along the seam line, then draw a line perpendicular to the seam. Stitch across this line. Repeat for the other corner of the bag. This results in a flat bottom. If you don't want a flat bottomed bag, omit this step.


9. Press all seams flat - as much as possible.
10. Apply piping to the top of the bag, again using a zipper foot. Begin at one side seam and taper the ends of the piping down into the seam allowance.

11. Press handle loop strip in 1/4 inch on each long edge. Fold edge in half and press together. Stitch down the center of the strip. Cut strip into 4 - 2 1/2 inch pieces. You will have a bit leftover - just discard.
 12. Mark top centers of bag with pins. Measure the distance between the handles you've chosen and divide that measurement in half. The handles I chose were 5 1/2 inches wide, so I marked half of that distance on either side of the center mark (2 3/4 inches from the center.)
13. Fold loops in half. Pin the loops to the inside of the bag at the marks on either side of the center. Match the bottoms of the loops to the bottom of the piping. Stitch close to the piping, using a lower gear to get through all the layers, if your sewing machine has one.

The bag is nearly completed - you just need to add the lining.
14. Fold the lining fabric in half, right sides together and stitch the side seams. Box the bottom in the same way you did the top. Press all seams flat.

15. Press 3/8 inch to the wrong side of the top of the lining.
16. Insert the lining into the bag, wrong sides together. Pin the lining to the top of the bag, just underneath the piping. The scissors in the bottom of the bag in this photo were just to provide weight so it would stand up.

17. I like to handbaste the lining in at this point. I find that basting now makes the stitching later neater and easier to handle.
18. Top stitch along the top edge of the bag, just under the piping, making sure to catch in the lining fold on the wrong side. Again, use a zipper foot to allow you to get close to the piping. Stitch again, 1/4 inch below the first stitching, if you like.

19. To prevent the lining from pulling loose from the bottom of the bag, I tack it with handstitches along the box seams. I begin inside the bag and come up in the seam. The stitches are hidden by the seam that forms the box.

20. Attach the handles as per the instructions on the package.

Enjoy your summery new bag!
If you make this bag, I'd love to hear from you and see any photos you might have. Also, if you have trouble with the tutorial, please let me know. I'd be happy to answer any questions.


You totally amaze me by how many creative endeavours you undertake... in the midst of studies and all the rest of life's happenings.
ReplyDeleteI'd love to hang around you for a season --- I used to do a lot more in years past, not sure when it started slipping away. But you inspire me to venture forth into new frontiers of creativity. Thanks!
BTW, your bag is lovely.
I'm off to a writing conference for the next couple of days -- hope to catch some creative inspiration on that front.
So nice work . Wonder what else you can do . Seems to me you do everything . I olso do this and that . Right now I'm doing wall paintings . Finished the barn today . My friends use to say Kyllikki do what ever she wants and the other do what they can . I even can use hammer and saw . I don't know why I tell this .
ReplyDeleteThat's wonderful! Thank you for doing this tutorial. If I give it a whirl, I'll certainly let you know and I so do want to give it a try.
ReplyDeleteSuch a pretty purse!! I posted a link to your tutorial on Craft Gossip Sewing:
ReplyDeletehttp://sewing.craftgossip.com/tutorial-summer-handbag-with-wooden-handles/2009/07/27/
--Anne
The tutorial looks great! I will have to give it a try. Thank you!!!
ReplyDeleteWOW Lorrie...that was a very detailed tutorial--and the purse is great too! It's been YEARS since I made a purse but I still remember it--blue denim with an embroidered initial "J" (one of those iron on kind--LOL) Thanks for sharing yours with us!
ReplyDeleteHello Lorrie,
ReplyDeleteThis is a fabulous tutorial!
~ Gabriela ~
This bag looks just great and seems easy to do !! Though I know I by no means have time to do one right now. But I went through all your list of tutorial and I'm going to do the little felt hearts - I also have that same kind of fabric and didn't know what to do with it ! Problem solved !
ReplyDeleteI'll have to show you a pic of the mobile that I won at your giveaway and that we put together with Elise. She had so much fun ! She just loves these activities and she put glitter everywhere ! We are going away for two days, I'll send a pic when we get back.
What a cute purse. It would be fun to make in some coordinating fabrics, where each side is different, even the inside and pockets al a different fabric. I was informed that one of my projects had been linked to Craft Gossip Sewing so I popped on over to take a look and I scrolled down looking at some of the other projects. I hope you will come by for a visit to my blog as well and take a look. I have a give-a-way going on right now as well.
ReplyDelete(I did the project where I made my little girls nursery items and turned her baby quilt into her big girl bedding.
Cheri
Its So Very Cheri
oh I love it!!!
ReplyDeleteThank yo for the directions also!!!
I love the piping around the edges and how you placed your scissors inside the bag for the photo of the lining! Created the sense of the depth and orientation for the photo... ahha a for me any who!!!
Hugs,
Mary
*oh i love the color and the pattern you chose!
What a wanderful bag, thanks for sharing!
ReplyDeleteLovely bag. Thanks for the tutorial.
ReplyDeleteLove this Lorrie, I've sewn a lot of bags to give as gifts, love the step by step pictures of this tutorial. I've never done handles like that before, but they sure make the bag look classy. ~ Abby
ReplyDeleteThis comment has been removed by a blog administrator.
ReplyDelete